Courier Service Toolbox - Online Help - Edit Job Overview

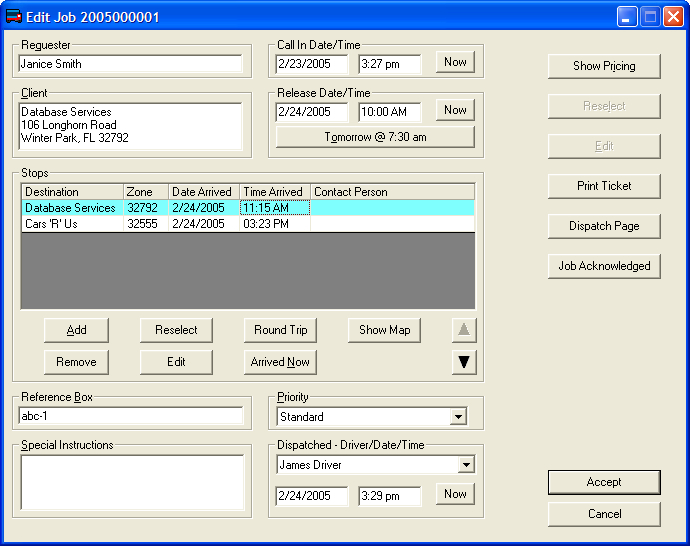
Welcome to the Courier Service Toolbox Online Help Tool for the Edit Job window. You can use your mouse to hover over the different fields on the edit job window to display text explaining what each field is for.


Requester: This field is where you type the name of the person who is requesting the service. Client: This field shows what client you are billing for this job. You can right-click in the "Client" box to edit or reselect the client for this job. Stops: This grid will display the destinations for each stop for this job. If you click on the actual destination (in the "Destination" column), the Destination's address information will be displayed. The Date/Time Arrived in the first Destination is used for the date/time that the package was picked up. The Date/Time arrived in the last destination is required to complete the job. This is when the package was delivered. Add: This button is used to add a Destination to the Stops grid. Remove: This button will remove the highlighted Destination from the Stops grid. Reselect: This button is used to replace the highlighted destination with another destination from your database. Edit: This button can be used to edit the highlighted destination in the Stops grid. Round Trip: This button will make this job a "Round Trip" (the first destination in the Stops grid, is the same as the last). Arrived Now: This button will insert the current date & time in the Date Arrived & Time Arrived fields for the highlighted destination  in the Stops grid. Show Map: This button can be used to display a map of the highlighted Destination's location. The Up & Down arrow buttons can be used to change the order of the Destinations in your Stops grid. Reference Box: Text written in the "Reference Box" appears on your client's invoice as a cross reference to their company's own internal tracking system. (This is usually used for billing their own clients.) If the word "REQUIRED" is displayed in the reference box it means that this client requires references on all jobs. Special Instructions: used to record important notes and/or details concerning the job. The special instructions will appear on the Dispatch Screen so that the dispatcher can inform the driver of what is expected by the Client. Priority: This is where you select what level of service your client is requesting (for example: Standard, Rush, etc). Dispatched: This is where you select the driver to be dispatched for this job. This is the Date & Time that the driver was dispatched. Call In Date/Time: This is the date/time that the service was originally requested. Clicking "Now" will insert the current date & time. Release Date/Time: This is when the package will be ready to be picked up. Clicking "Now" will insert the current date & time. Tomorrow @ 7:30am: Clicking this button will allow you to insert tomorrow's date for the Release Date/Time field. Accept: Clicking this button will save any changes made to the job. Cancel: Clicking this button will close the edit job window without saving any changes. Show Pricing: Clicking this button will display all charges pertaining to this delivery (job). Reselect: If the cursor is in the "Client" field, you can click this button to select a different client for this job. Edit:  If the cursor is in the "Client" field, clicking this button will allow you to edit the client's record. Print Ticket: Clicking this button will print a job ticket. Dispatch Page: Clicking this button will generate a page file. This is to be used if you are running a third party program that sends ASCII text messages to a mobile device. Job Acknowledged: This button is used to show that the driver has acknowledged receiving the dispatch page.